5 Things Every Photograph Must Have

Every photograph must have five things:

Dominant Subject

1.     It must have a main or dominant subject. This does not mean just a large object in the center of the frame. It may be small—less than 1/100th of the entire area—but it must be the main center of attention. Secondary subjects can surround or support the main one, but they should not compete with it. You must be selective in the placement of everything you include in the frame.

Logical Placement Within the Frame

2.     If a supporting subject is too near the lens or too near the edge of the frame, or too high or too low, it may lessen the overall impact. Objects must be placed logically.

Cohesion

3.     Cohesion is important. The elements of the image are held together by an intangible balance brought about through use of proper camera angle, lens choice, subject motion and position, and much more. Your job is to use all your resources to fit all the parts together without dividing the viewer’s interest.

Color or Contrast Balance

4.     Bright colors and high contrast changes are real eye-snaggers. These areas must be subdued or worked into the composition so that they pull the other elements together rather than creating a hot spot.

Nothing Else

5.     That’s not always the easiest one of the bunch. It takes a conscious effort and a lot of shooting to arrive at the point where everything in the picture is noticed. Every detail must be dealt with. Many a telephone pole or tree branch has suddenly “appeared” in the finished picture, growing from some dear lady’s ear. The crack photographer will notice every detail before he or she releases the shutter.

Essential Outdoor Photography Gear

There is a minimum of equipment that outdoor photography requires. The bare essentials begin with a 35mm body, a wide-angle lens, a medium or normal lens, and a telephoto. A few filters must be added, a cleaning kit, tripod (or a unipod and clamp), and a carrying case.

Choosing a lens can be confusing if all the available lenses in one particular system are laid out before you. For instance, Nikon offers a 6mm fish-eye that will see behind the camera itself, a 200mm reflex that sees things the human eye can’t, and there are 65 other lenses in between. Where do you begin? Many of the lenses are close in focal length, and it would be senseless to try to own or use all of them. With the three basic lenses, the mid-range of focus is adequately covered, but there will be times when your wide angle just can’t squeeze it all in or when a wider view with distortion will add a unique quality and depth. I prefer the 16mm fish-eye for its ultra-wide 170-degree view, and the distortion it provides. Inside, or for architectural use, it bends walls and buildings a little too much. But outdoors it stretches things out forever, so you can get more in. Others prefer the 18mm or the 15mm wide angles, which do not bend straight lines. One lens in the ultra-wide (13mm to 20mm) department will be very useful.

A long lens also will help bring in the country on the other side of the river, and a few extra markets from over there, too, the reflector lenses. These lenses bounce light from a donut-shaped mirror near the back element to a tiny mirror at the front, and from there back to the film. In so doing the actual length of the lens can be reduced by several times its normal size. This makes 300, 400, and 500mm lenses much more practical for the mobile photographer.

Outdoor Photography Lighting Technique No. 5

Unmodified sunlight is always almost right, which is its temptation and its failure. In frustration, many photographers resort to electronic flash. Fill flash is the most versatile way to enliven Mother Nature’s light, and the most vexing, at least for a while. Theoretically any light would do, not just an electronic flash, but since most continuous light sources are not color balanced for daylight, do not have adequate intensity, and don’t usually have portable power supplies, they’re better off left at home.

Outdoor Photography Lighting Technique No 5 – Fill Flash

Electronic flash units are portable, as powerful as your bank account will permit, and compatible with all light sources. They can be used for a variety of effects. Electronic flash can do anything a reflector will do, only better. For example, increasing the light on the subject through reflection will darken the background by at most one f-stop. FIll flash, on the other hand, can make a difference of three or more f-stops.

Even if the intent is not to modify the background, adding light to the subject will allow for slight overall underexposure (for reversal films), increasing color saturation while maintaining an optimum exposure. The flash also can pinch hit where routine reflection might not be sufficient, such as mottled light caused by uneven shading, or in an unevenly lit scene of extreme contrast when there isn’t enough light to bounce. A flash can highlight selective areas and more than one light can be used at any time. Finally, the short duration of the flash provides an assortment of other tricks, such as stopping action and creating blur.

So what’s wrong with flash? Three minor faults, altogether. First, electronic flash is artificial light and looks as such. You will find a dual solution: Determine exact exposure then back off one-half to one f-stop so its presence isn’t so obvious, and the more natural coloring shows through. Next, get the unit away from the camera so the light isn’t flat and can provide modeling to the subject.

The second strike against a flash unit is that its results aren’t visible. If that is a problem for you, buy a portable unit with modeling lights, or rig your own modeling light. Ultimately, with enough experience, placement becomes second nature.

The third and biggest problem with flash is getting it to work properly, which is next to impossible without the right equipment and knowledge. The former will cost about $300 and the latter your time.

Sinar Bron dissolved its incorporation in the United States 1991, but their SLR portable flash units with modeling lights are occasionally available through Shutterbug (shutterbug.com). Leading electronic flash manufacturers today are Neewer (neewer.com) and GODOX (godox.com). VOKING is a good choice for Nikon digital SLRs and more recently available for other camera models as well (check amazon.com or ebay.com for availability).


Outdoor Photography Lighting Technique No. 4

Skillfully used, sunlight can be as flexible as studio light. Here is my fourth camera and lighting technique for making that bold stroke necessary for the quantum leap from ordinary to excellent in your action shots: 

Subtract Light

Sometimes more can be gained by subtracting from the light. Most photographers are familiar with extracting polarized light, haze, and other assorted light waves with filters. Nature itself provides another form of light reduction in open shade, known by many and used by few. In this image I captured from the shade of a giant boulder, rim lighting helped accentuate the climber’s leg against the shadows of the rock. In any kind of extreme sports photography, optimize dramatic lighting tricks.

Outdoor Photography Lighting Technique No. 3

Skillfully used, sunlight can be as flexible as studio light. Here is my third camera and lighting technique for making that bold stroke necessary for the quantum leap from ordinary to excellent in your action shots:

Change Your Position

As simple as it may seem, move your feet. Changing the camera’s position relative to the subject allows 360 degrees of precise natural-lighting angle. Unfortunately, many photographers don’t think of the sun with studio techniques in mind, such as the three-quarter lighting or rim lighting photography-but they should. The idea is to stay aware of the variables and change them to your advantage rather than adopting the take-what-you-get attitude.

I shot a winter sport known as ice diving. The sun’s late afternoon angle ordinarily would have been fine, but as a result of the divers’ headgear, their eyes never saw the light of day. My first inclination was to expose for the shadows to give the eyes the center of attention, but that would have washed out what little detail showed in the surrounding bright ice. What I really needed was my light moved, and the only way to accomplish that was to ask the scuba divers to surface at the opposite end of the hole. It worked. The light illuminated the translucent ice, the dark equipment, and the masked eyes in unison.


Outdoor Photography Lighting Technique No. 2

Outdoor Photography Lighting Technique No. 2: Leverage Natural Reflection

In the previous post I discussed reflectors. A key distinction between manipulated reflection, which I call redirection, and ordinary reflection is that the former can be aimed. Simple reflection doesn’t have much versatility, but should never be overlooked as a useful agent. Reflection occurs naturally off any light-colored object, such as sand, snow, water, white walls and the like. The problem is that it seldom reaches the subject in a flattering manner.

So it is up to the photographer to realize it is there in the first place, and then devise a way to harness it. Be sensitive to the fact that whenever a large bright surface is near your subject, there is sure to be reflection. Look for it and then work it into your picture by moving the subject or source around until you can take advantage of it.

In this image, I modified naturally reflecting light from Lake Michigan with a mirror lens.

Outdoor Photography Lighting Technique No. 1

The difference between light and almost the right light, to paraphrase Mark Twain, is like the difference between lightning and a lightning bug.

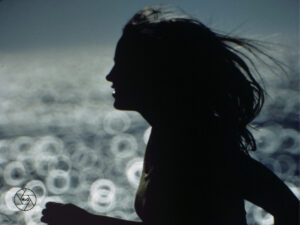
Unmodified sunlight is always almost right, which is its temptation and its failure. Yes, most outdoor photographers still use daylight as-is, never considering how easy it is to bend it, dial its intensity up or down, change its color temperature, extract selected light waves from it, diffuse or focus it, change or reverse its direction, mix it with other light sources, bypass it or enhance it. All this and more can be accomplished by either supplementing or screening the light with simple outdoor photography lighting techniques. Skillfully used, sunlight can be as flexible as studio light. Often these techniques provide that one extra bold stroke that is necessary for the quantum leap from ordinary to excellent action shots.

Outdoor Photography Lighting Technique No. 1: Redirect Light

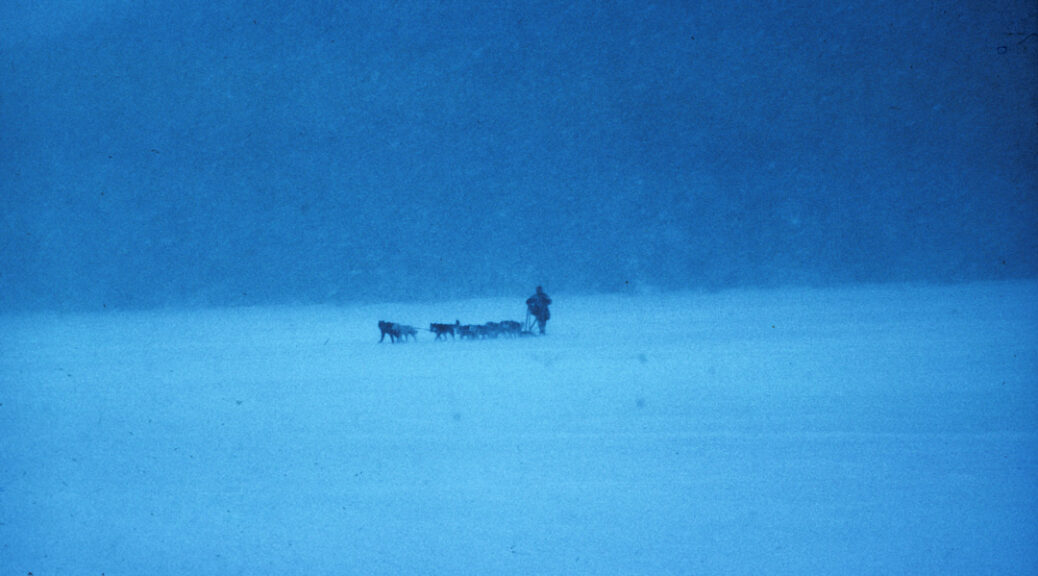
Redirecting sunlight with a reflector is one of the more effective ways to change the quality of sunlight. For instance, suppose your subject is backlit with little detail showing on the facing side. You could expose for the shadows, but at best that gives you lousy contrast, but retains background density as well.

Several types of reflectors can be used with a variety of effects. Large white reflectors absorb some light and reflect some, thus balancing the light distribution more evenly between the subject and its surroundings. There are some excellent reflectors that collapse to a compact size for the outdoor sports photographer manufactured by Neewer, Etekcity, and Selens. These companies also sell clips to attach the reflectors to your tripod. Manfrotto and Godox make combination reflectors, which include silver, gold, and black (no) reflectance, as well as white. Dean Collins, “Master of Lighting,” offers plans for making your own. Dean Collins’ YouTube videos are master classes in lighting and well worth watching. For the budget conscious, a reflector can be made out of PVC pipe, using large sheets. Or you can use foam-core board normally used as picture backing, found in frame shops, also work well, are light to transport and are inexpensive. In practice, almost any large white surface on hand will suffice. The only requirement is that the board must be used as close to the subject as possible without showing in the frame.

Silver reflectors return more light and offer several advantages. For one, they are more effective at greater distances from the subject. They also provide a sharper light source, which results in greater contrast and detail. In fact, the intensity of the light can even be increased by concentrating it on a specific area, thus allowing underexposure of the background-a powerful tool at your disposal. This technique can be used to separate the subject from its background, shift emphasis in the picture, erase busy background detail, highlight a selective area and for countless other refinements
.
Various substitutes can be used, ranging from window glass, stainless steel, more mirrors that concentrate light enough to spot-focus it. What makes silver reflectors particularly easy to work with is that you can see further results and monitor them visually, making adjustments until you are satisfied. Occasionally I use my gold reflector, especially in warm afternoon light, but the results are less easy to monitor.

Manufacturers mentioned that make reflectors include Neewer (neewer.com) and Etekcity (etekcity.com). Selens makes a collapsible silver reflector that can be purchased through Amazon. Although collapsible reflectors are handy, I more often use my umbrella-style 33″ reflector. I just feel it gives me more control over redirecting light. And it slides into the same nylon sack as my tripod and is no extra trouble to carry.

Winter Film Photography

When winter rolls in, most cameras go up on the shelf. The ones that do venture out meet with a pretty high casualty rate in both equipment failure and film results. When temperatures stay above zero degrees, things run near to normal. Below zero, things begin to pop and crackle. Film speed slows down causing underexposure, shutter curtains contract and function slowly causing overexposure, light-meter batteries wear down rapidly and don’t deliver proper readings—or quit altogether. Films produce static electricity when advanced and this mini-lightning streaks the film, or worse, the film base becomes brittle and breaks inside the camera. Lenses fog up inside and outside then the fog freezes on the lens. Controls on the body contract and are too tight to move, and if that isn’t enough, I once froze my nose to the back of a camera! I had to go inside to thaw it off.

The first step is to purchase a well-designed manual camera, like the Nikon F (vintage, admittedly, but plastic parts won’t hold up). Then leave the camera either inside or outside: don’t take it in and out repeatedly. If you are traveling outside, you can keep it relatively warm by wearing it under several layers of clothing. You don’t want to get it too close to your body, which stays close to 98 degrees, or your own body moisture will cause condensation.

When you load, actuate the advance several times to loosen it, then turn the film slowly to minimize the chance of static electricity or breakage. Keep film in a pocket before loading. Wear nylon gloves inside heavier mittens and leave the nylons on while operating the camera. Install a “soft” shutter release to facilitate operation with gloves or mittens. Use alkaline batteries. Many light meters currently are using PX 13 cells. These should be replaced with PX 625s, which your dealer will tell you are identical. Don’t believe him; insist on the 625s.

Even if all goes well, you may still end up with gray snow. The explanation is simple. Your light meter is constantly striving to balance the light according to an imaginary gray card. Therefore, when all that shows is white, the meter thinks “Let’s make all this gray like it should be,” and underexposes. Correction for this involves experimentation as it varies according to the amount of sunlight hitting the area. Usually one half to one stop over is sufficient.

If there is to be extended use in extreme conditions, you may want to winterize the camera. This involves disassembling the entire unit and re-assembling with a thinner lubricant or none at all. It is a very time-consuming job and quite expensive, and the camera should not be used in warm weather again until you reverse the process. Typical uses of such treatment have been on expeditions to the Himalayas or Antarctica. Whenever a camera is subjected to such injustices and maltreatment, it should be coddled and cossetted with a little TLC.